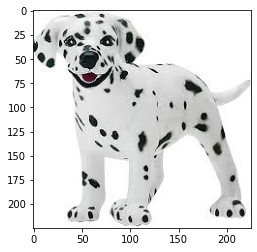
Image Classifier for Dog Breed

getty images
Introduction
This article will demonstrate on how to build a fantastic app, primarily based on python, that will help you to classify an dog’s image to its relevant breed. We will also add a fun extension that will add feature to classify an human image with its resemblance to a dog breed.
Before I dug deep into the specifics of the project, I would like to mention that this project was Capstone project for my Udacity’s Data Science NanoDegree. So I would like to say thanks to Udacity team for guiding the whole process.
Overview
The methodology to build this classifier will use the concept of convultional neural network (cnn). The application built on this cnn should be able to take input of the image path and provide output the breed of the dog if it is a dog image and if the image pertains a human it will provide output of the most resembling dog breed.You can learn more about the cnn working though this source . We will focus on how to build such cnn into our application.
To build this convolution networks we will be using keras-libraries to build our complete model and data images from Imagenet . So in large we will go through following step in order to build our application :
Get image datasets to train our model
Setup to preprocess our images into tensor
Functions to detect human faces and dog images
Creating a CNN from scratch (To understand its components)
Using transfer learning to build efficient CNN
Final setup to complete the application
Data Preparation
We would require enough images to have our model suitably trained for good accuracy.You can follow the instructions indicated here 1 to get yourself setup for data and next procedures. In the provided instrcutions we are downloading the zip files from LFW and ImageNet for human faces and dogs breed. By using zip files provided in the instructions and extracting them, we finally get well labelled folders of images. This will help automatically labelling them when we load these images.
After extracting, we will load these files into variables for further analysis, through the use of the load_files function from the scikit-learn library:
train_files,valid_files,test_files- numpy arrays containing file paths to imagestrain_targets,valid_targets,test_targets- numpy arrays containing onehot-encoded classification labelsdog_names- list of string-valued dog breed names for translating labels
This will also help to properly segreate the data into the training , validation and testing sets.
The code to enable it as follows :
# function to load train, test, and validation datasets
def load_dataset(path):
    data = load_files(path)
    dog_files = np.array(data['filenames'])
    dog_targets = np_utils.to_categorical(np.array(data['target']), 133)
    return dog_files, dog_targets

# load train, test, and validation datasets
train_files, train_targets = load_dataset(data/dog_images/train')
valid_files, valid_targets = load_dataset('data/dog_images/valid')
test_files, test_targets = load_dataset('data/dog_images/test')

# load list of dog names
dog_names = [item[20:-1] for item in sorted(glob("data/dog_images/train/*/"))]

# load filenames in shuffled human dataset
human_files = np.array(glob("data/lfw/*/*"))
random.shuffle(human_files)
Data Exploration :
- The data obtained from the sources have following characteristics :
Total dog categories :
133Total dog images :
8351No. of training dog images :
6680No. of Dog Images for validation set :
835No. of test Dog Images :
836
Thing to not here is that this numpy array only contains the path of the images.
Image Pre-processing
If you check the shape of the image,especially the dog images ,you will find that each image has different resolution. Thus all the images we have need to be brought into same size/shape inorder to have them analyzed by the neural networks. This is because each pixel in picture is considered one data point and neutral network at entry point can connect with fixed number of data points.
Thus following function are created to reduce the images in our index into shape of [224,224,3] :
from keras.preprocessing import image
from tqdm import tqdm

def path_to_tensor(img_path):
    # loads RGB image as PIL.Image.Image type
    img = image.load_img(img_path, target_size=(224, 224))
    # convert PIL.Image.Image type to 3D tensor with shape (224, 224, 3)
    x = image.img_to_array(img)
    # convert 3D tensor to 4D tensor with shape (1, 224, 224, 3) and return 4D tensor
    return np.expand_dims(x, axis=0)

def paths_to_tensor(img_paths):
    list_of_tensors = [path_to_tensor(img_path) for img_path in tqdm(img_paths)]
    return np.vstack(list_of_tensors)
Note:
This function takes a single image path or array of them and convert into tensor of
[* ,224,244,3]shapes respectively. 2
Secondly, neural network learning is balanced when the values are within (0 ,1). So we will scale the RGB values from (0,254) to (0,1).
Thus following conversion are used to scale each pixel (RGB) value between (0,1):
train_tensors = paths_to_tensor(train_files).astype('float32')/255
valid_tensors = paths_to_tensor(valid_files).astype('float32')/255
test_tensors = paths_to_tensor(test_files).astype('float32')/255
Functions to detect Human Faces and Dog Parts
Since the data is ready to be consumed for our model, before start creating model, we need to create functionality which can detect whether given image has human face or has dog in it. After detecting this then only we can further process to detect the image. This mentioned concept will work as the central check in our algorithm for our application.
So we will use the following functions to detect human faces and dog pictures respectively:
#detect human faces
# returns "True" if face is detected in image stored at img_path
def face_detector(img_path):
    img = cv2.imread(img_path)
    gray = cv2.cvtColor(img, cv2.COLOR_BGR2GRAY)
    faces = face_cascade.detectMultiScale(gray)
    return len(faces) > 0

#detect dog presence in picture
from keras.applications.resnet50 import preprocess_input, decode_predictions
def ResNet50_predict_labels(img_path):
    # returns prediction vector for image located at img_path
    img = preprocess_input(path_to_tensor(img_path))
    return np.argmax(ResNet50_model.predict(img))

# returns "True" if a dog is detected in the image stored at img_path
def dog_detector(img_path):
    prediction = ResNet50_predict_labels(img_path)
    return ((prediction <= 268) & (prediction >= 151))
Build dog breed detection
Let’s build the neural network since we have all the ingredients with us .
CNN from Scratch :
To build a cnn, you have to create a series of perceptron layer which learns specific a feature about of the given data. If you refer the titular picture, you could undertand that different types of perceptron layers used like : Convolution layer, pooling layer, connected layer etc. So to build our own CNN layer, we built the following model architecture for the application:
Model: "sequential"
_________________________________________________________________
Layer (type)                 Output Shape              Param #
=================================================================
conv2d (Conv2D)              (None, 223, 223, 16)      208
_________________________________________________________________
max_pooling2d (MaxPooling2D) (None, 111, 111, 16)      0
_________________________________________________________________
conv2d_1 (Conv2D)            (None, 110, 110, 32)      2080
_________________________________________________________________
max_pooling2d_1 (MaxPooling2 (None, 55, 55, 32)        0
_________________________________________________________________
conv2d_2 (Conv2D)            (None, 54, 54, 64)        8256
_________________________________________________________________
max_pooling2d_2 (MaxPooling2 (None, 27, 27, 64)        0
_________________________________________________________________
global_average_pooling2d (Gl (None, 64)                0
_________________________________________________________________
dense (Dense)                (None, 133)               8645
=================================================================
Total params: 19,189
Trainable params: 19,189
Non-trainable params: 0
_________________________________________________________________
The code to generate this cnn from keras library is as follows :
from keras.layers import Conv2D, MaxPooling2D, GlobalAveragePooling2D
from keras.layers import Dropout, Flatten, Dense
from keras.models import Sequential
from keras import Input

model = Sequential()
model.add(Conv2D(input_shape=(224, 224, 3),filters=16, kernel_size=(2,2) ,strides=1, activation="relu"))
model.add(MaxPooling2D(pool_size=(2, 2)))
model.add(Conv2D(32, (2,2), strides=1, activation="relu"))
model.add(MaxPooling2D(pool_size=(2, 2)))
model.add(Conv2D(64, (2,2), strides=1, activation="relu"))
model.add(MaxPooling2D(pool_size=(2, 2)))
model.add(GlobalAveragePooling2D())
model.add(Dense(133, activation="softmax"))

#print model
model.summary()
When we train this model, we see that it takes much time to learn. In our case, each loop took almost 3 min per epoch on CPU and for 20 epoch it took and hour. After this 20 epoch training period, it
accuracy was around 5%.So thus to improve the learning rate and accuracy, we have to use the technique called
transfer learning.
Improving and Fine-Tuning the model :
getty images
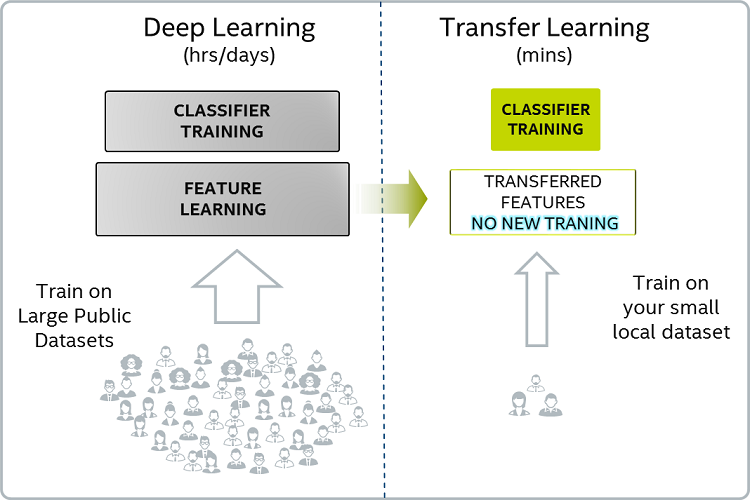
Transfer learning helps to create custom cnn from already rigorously pre-trained model for a specific objective. In this technique, weights of pre-trained (except of final fully connected layer) are obtained and coupled to new dense layer to retrain on the given data . Here the learning or weight modification happens only for dense layer . In our case using the feature from one of the pre-trained models like ResNet50, VGG16, VGG19 & InceptionV3 present in keras, a fully connected layer will be trained to detect the breed out of available 133 categories.
Thus following code will create the model by using bottleneck_feature technique :
#obtaining bottleneck features out of pre-trained network
network='InceptionV3'
bottleneck_features = np.load(f'bottleneck_features/Dog{network}Data.npz')
train_incept = bottleneck_features['train']
valid_incept = bottleneck_features['valid']
test_incept = bottleneck_features['test']

Incept_model = Sequential()
Incept_model.add(GlobalAveragePooling2D(input_shape=train_incept.shape[1:]))
Incept_model.add(Dense(133, activation='softmax'))

Incept_model.summary()

Model: "sequential_2"
_________________________________________________________________
Layer (type)                 Output Shape              Param #
=================================================================
global_average_pooling2d_2 ( (None, 2048)              0
_________________________________________________________________
dense_2 (Dense)              (None, 133)               272517
=================================================================
Total params: 272,517
Trainable params: 272,517
Non-trainable params: 0
_________________________________________________________________
Implementation of application
- By using the fruits of above explained , we can now create a detection function which will to intended job as asked by the problem statement of this article:
For human in picture provide the resemblance with dog breed.
For dog in picture, predicts its breed.
Thus following function created will do that job :
from extract_bottleneck_features import extract_InceptionV3

def predict_breed(img_path, extractor=extract_InceptionV3 ,model=Incept_model,
                names_list=dog_names):
    #extract tensor from img path and then bottlnect_feature
    tensor=path_to_tensor(img_path)
    bottleneck_feature=extractor(tensor)
    # obtain predicted vector
    predicted_vector = model.predict(bottleneck_feature)
    #display img from img_path
    img = cv2.imread(img_path)
    cv_rgb = cv2.cvtColor(img, cv2.COLOR_BGR2RGB)
    plt.imshow(cv_rgb)
    plt.show()
    # return dog breed that is predicted by the model
    return names_list[np.argmax(predicted_vector)].split('.')[1]

def predict_outcome(img_path):
if face_detector(img_path):
    breed = predict_breed(img_path)
    print(f"The human in the picture has resemblance to '{breed}' dog breed ", '\n')
elif dog_detector(img_path):
    breed = predict_breed(img_path)
    print(f"The detected dog in the picture belongs to '{breed}' breed ", '\n')
else:
    print( "Image is unrecognizable towards any Dog or Human, please provide better picture" )
Results
Following are the results when tried on following 4 test images :
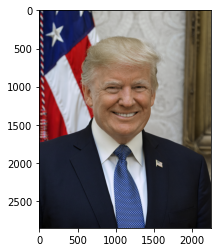
Result 1: Outcome of Donald_Trump.jpg
The human in the picture has resemblance to ‘Icelandic_sheepdog’ dog breed
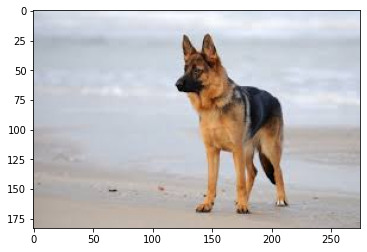
Result 2: Outcome of shepherd_2.jpeg
The detected dog in the picture belongs to ‘German_shepherd_dog’ breed
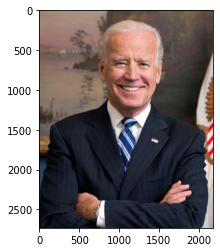
Result 3: Outcome of Joe_Biden.jpg
The human in the picture has resemblance to ‘Icelandic_sheepdog’ dog breed
Improvements for the future
- Following steps can be taken to improve the complete application:
Increasing the depth of the fully connected layer, to enhance the accuracy of breed detection.
Using Data Augmentation to increase the detection precision even for bad quality pictures.
Improving the detection algorithm to handle the case of picture having person and dog in it .
Providing more data related to each breed to increase the accuracy towards special cases of the breeds.
If memory and computation permits, using 3 or more models to pass the given the image and use the consensus predicted results to increase the accuracy further. This will help to remove the inherent accuracy among each of the model.
Conclusion :
We demonstrated that by using convultional network , a python application can be created to detect the dog breed.
As fun extension, we also tried the model to provide the resemblance breed of dog for the human in picture.
Model worked with around 80% accuracy and provided guidelines to further fine tune this model.
Used transfer learning technique like bottleneck-features to speed up the training process.
Footnotes
